Photography Part 2
PART 2
POLICE PHOTOGRAPHY
THE ELEMENTS OF PHOTOGRAPHY
[1] Light
[2] Sensitized Materials
[3] Camera
[4] Chemical processing
The Light:
LIGHT is radiant electromagnetic energy that can be detected by the human eye. Visible light is only one very small part of the vast spectrum of electromagnetic radiation.
ELECTROMAGNETIC RADIATION ARE:
(1) Radio Waves
(2) Infrared Radiation
(3) Visible Light
(4) Ultraviolet Light
(5) X-rays

(Above is an illustration of how vast electromagnetic radiation is. We will be dealing with the 5 radiation listed above being among the most useful lights in the science of photography and how are its uses.)
THE FOLLOWING ARE LIGHTS IMPORTANT IN PHOTOGRAPHY
1. INFRARED LIGHTS
These are light having a wavelength greater than 700 millimicrons. Its wavelength ranges from 700 – 800 millimicrons. Infrared is not a color or any kind of red. It is an invisible ray and detected by the skin as HEAT. It is called “Infra-Red” because they sojourn below the red spectrum.
The Use of Infrared in General Photography
Infrared photography refers to a special type of photography using film or sensors that have infrared light sensitivity. By using infrared light in a photograph one can add special effects, like false colors, to photographs. But because our intention is evidential photography adding color should not be applied.
When you are learning about the basics of infrared photography, you should also note that this type of photography has the ability to penetrate light fog and haze in a successful way, to bring out a clear image. This most applied during night photography and the purpose is to saturate or exploit the area of things of interest related to crime and cases within the interest of the police.
(Above is an example of the clarity of the night, even darkness when infrared photography is used.)
Though digital photography and HDR (high-dynamic-range) photography are now ruling the market, one cannot ignore the importance of infrared photography. For some applications, infrared photography is still considered to be the best choice:
(a) Taking snaps in a dark room
(b) Capturing wildlife at nighttime in complete darkness
(c) Create a chalky appearance on the photograph by using IR photography outdoors or indoors with the availability of clear light
(d) Capturing images during the state of war, where light availability is reduced during the night
The Capability of Infrared Photography in Law Enforcement and Forensic Science
Through the use of specially prepared infrared plates and films and flash lamps, details, which are normally invisible, may reveal evidence of value in a criminal investigation. Infrared photography differs from normal PHOTOGRAPHY IN SOME RESPECTS. For example, the focus of the camera by visible light will be inaccurate for infrared radiation exposures because of the longer wavelength of infrared.
Infrared photography is utilized for such purposes as the following:
[1] Restoring original writings on charred paper
[2] Restoring questioned, old, or faded documents
[3] Detecting old scars or obliterated tattoo marks, and
[4] Penetrating layers of grease or grime
Infrared photography may also be utilized for flash photography in almost no visible light to be seen are available for use in “blackout flash” techniques (this is simply known as “NIGHT PHOTOGRAPHY using infrared techniques). A filter over the camera lens is not necessary when using “blackout” flash lamps.
Photographs of infrared disclosures should be accompanied by normal photographs of the same object. The composition of normal and infrared comparison should be the same if possible. (See the example below)


2. THE VISIBLE LIGHTS
The range of visible light produces different sensations when they strike the human eye. The colors of the different objects are usually mixtures of light, of various wavelengths, and not a special color. The wavelength of visible light is from 400-700 millimicrons, which produces white light. Visible light makes objects visible and produces color.

Wavelength according to color is shown below.

When light falls on an object or material, three phenomena will arise. They are:
1. ABSORPTION.
This is the transmission of light on any material as it passes through it. Objects that caused absorption are TRANSPARENT OBJECT.
2. REFLECTION.
The bouncing back of light upon hitting an object or material. Objects that caused reflection are OPAQUE OBJECT.
3. REFRACTION.
This is the change of direction of light as it passes on an object or materials. REFRACTION occurs on TRANSLUCENT OBJECT.

All the above phenomena happen operationally when operating a camera where the combination of lenses (absorb the image), the mirror (caused the reflection of the image towards pentaprism), and prism (refracted the image to fit in the viewfinders) records and visualize the image to be captured by the camera.
Note: The capability of the camera to absorb the wavelength will depend on the nature and purpose of photography (e.g. Use of special lenses and lights whether for scientific, arts, panoramic, forensic). As a photographer, you need to be familiar with the use of light and its proper use in photographic techniques.
3. THE ULTRA-VIOLET LIGHTS
The ultra-violet light is divided into near and far ultra-violet and ranges from about 200 to 400 millimicrons wavelength. This ray of light is also invisible like the infrared. Its position falls between X-ray and Visible wavelength. Ultraviolet rays from the sun create a layer of ozone (a special form of oxygen) to protect the living organism on earth.
Its importance in photographic works is the underlying notion in ultra-violet photography, where an object who possesses ultra-violet constituents gives up energy in the form of visible light that produces fluorescence objects if special lighting is applied.

Photography of ultra-violet disclosures differs from ordinary photography in that the light source is usually provided by special lamps. A good trade of panchromatic film with a yellow filter is used in ultraviolet photography. A normal photograph of the subject is required for comparison purposes and should accompany the ultraviolet photographs.

Some examples of ultra-violet subjects are:
= Semen, blood, and urine stains
= Secret inks
Fingerprint on the multi-colored background when dusted with an ultra-violet-sensitive powder.
Fluorescence shown in a photograph is not proof of the identity of the substance causing the fluorescence. Laboratory analysis is necessary to determine the conclusive identification of a substance causing the fluorescence. For this reason, it will be necessary to forward most objects to the nearest crime lab for processing of the evidence.


The above examples are photographs showing stained surfaces that are invisible to the human eye but may become visible only through ultraviolet photography. There are some processes required in the laboratory to enhance the image, especially of a human stain like blood like by spraying it with luminol to give more visibility to the stain.
In the case of ENTRAPMENT, invisible fluorescent powder and stains are dusted on the money or effects and can be checked only by ultra-violet examinations.
4. THE X-RAYS
This is electromagnetic energy having a wavelength that ranges from 10 to 30 millimicrons. Object, which is opaque as seen by the naked eye, can be penetrated by x-rays. To produce a shadow photograph of an internal structure of solid objects, X-RAYS is suitable.

This is an example of the use of x-rays in illegal migration campaigns in some borders in the United States (especially along Mexican borders). The above x-rays photographs reveal that illegal immigrants are placed in between products and effects so that during a manual and physical inspection they will not be detected.
Note: For more discussion about the use of photography in law enforcement and criminal investigation, you can click this to download a pdf about “Practical Police Photography”.
THE SOURCES OF PHOTOGRAPHIC RAYS
There are two sources of light. They are known as the NATURAL and ARTIFICIAL light. Natural Light is lights that come to existence without the intervention of man, and artificial light is lights that are manmade. In photography, natural light is used for outdoor photography and artificial light is used for indoor photography to augment the adverse lighting condition and during the night time. (below are common sources of natural lights)
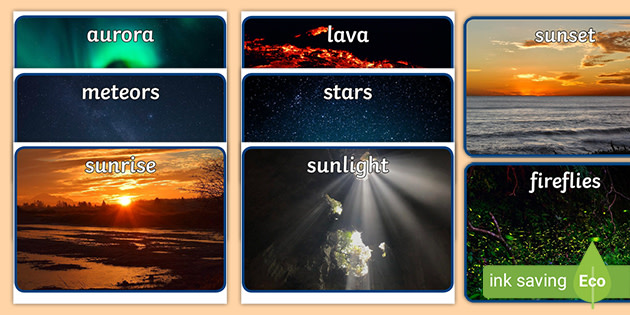
The lighting contrast depends upon the sunlight available in the daylight; when the sun is not covered by clouds, then the contrast is HIGH. On the contrary, if the sun is covered with clouds the contrast is LOW. In the process of photographing an object, the lighting condition and contrast must be considered in the exposures of the film. It is suggested that the recommendation is given by the manufacturer of the film and camera and should be observed religiously to produce good and quality photographs.
CLASSIFICATION OF DAYLIGHT ACCORDING TO ITS INTENSITY:
(1) Bright Sunlight
(2) Hazy Sunlight
(3) Dull Sunlight
ARTIFICIAL LIGHT. Almost all-artificial light sources can be used in photographing objects, as long as the light is capable of exposing the sensitized materials. The following are types of artificial light for photography:
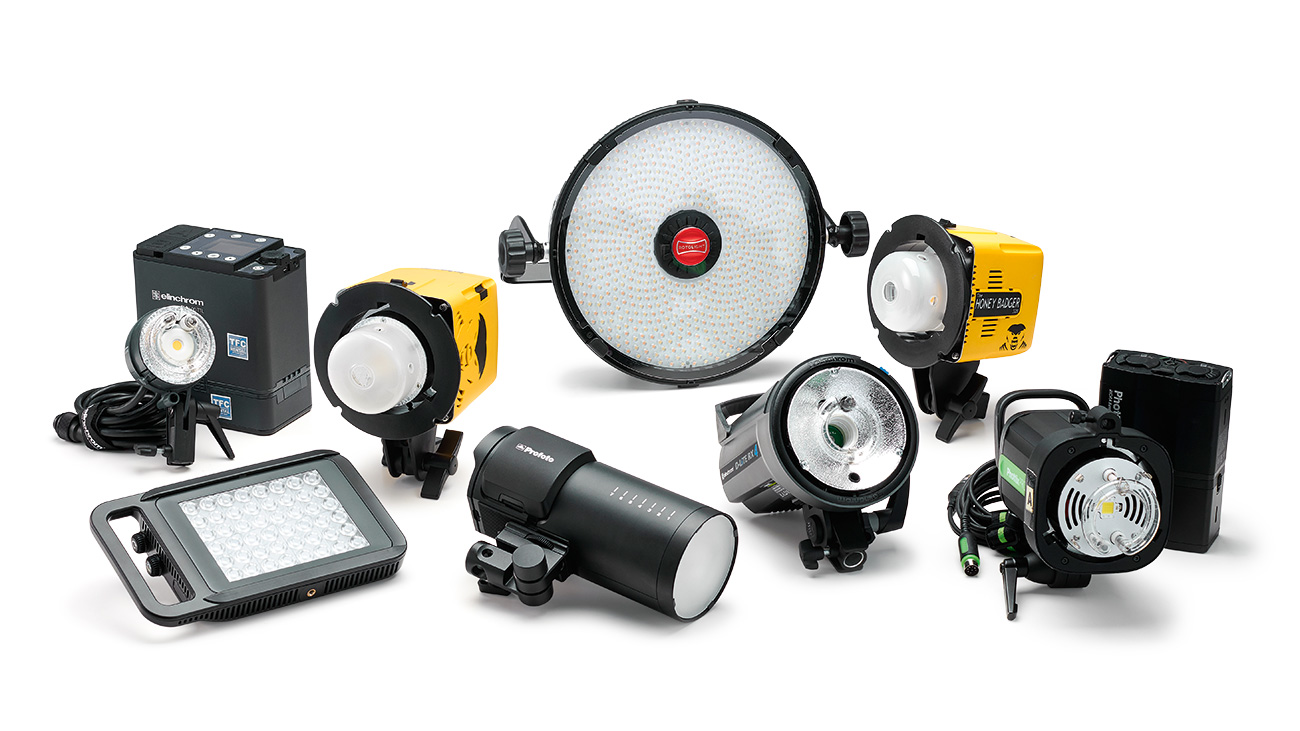
(a) PHOTOFLOOD LAMP – a reflectorized light or spotlight (for studio and laboratory).
(b) FLASH BULB – are chemical lamps, as they generate lights by the rapid combustion of metal in oxygen. (Almost obsolete)
(c) ELECTRONIC FLASH – it produces light by instantaneous electrical discharges between two electrodes in a gas-filled glass bulb (the most common).
(d) FLUORESCENT LAMPS – are tube lamps wherein the walls are coated with materials capable of fluorescing.
(e) INFRARED LAMPS – a special type of artificial light that is capable of producing infrared radiation.
(f) ULTRA-VIOLET LAMPS – is a gas lamp burning disulfide vapor in oxygen or in nitric oxide.
THE CAMERA AS AN ELEMENT OF PHOTOGRAPHY
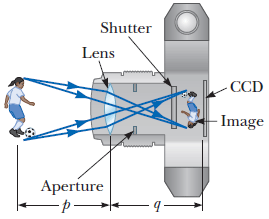
CAMERA is defined as a light-tight box, with a means of forming the image (lens), holding sensitized materials (film holder), and with a means of controlling the amount of light that reaches the film. It is a device used in photographing objects.

The principle behind the camera can be explained by the image above. A pinhole camera absorbs the image inside it because of the action of light. The image reflected will then be recorded on the surface of materials sensitized with chemicals and subjected to chemical development to make the image visible. The image was called negative because of its inverse or opposite appearance of the original image.
FOUR ESSENTIAL PARTS OF THE CAMERA
(1) Light Tight Box.
This part of the camera is very essential because of its capability to exclude all unwanted light that may expose the sensitized materials or film. It is an enclosure that is devoid of lights.
(2) The Lens.
This is the one responsible for focusing on the rays of light coming from the subject. It is one of the most important parts of a camera because, without a lens, it is impossible to form a sharp image on a film.
(3) Film Holder.
The film holder holds the film firmly inside the camera. It is always located at the opposite side of the lens of the camera.
(4) The Shutter.
It served as the barrier to the rays of light that will enter and affect the film inside the camera. It usually placed in the path of the light passing thru the lens.
:max_bytes(150000):strip_icc():format(webp)/GettyImages-141482590-581d080e5f9b581c0b8483a8.jpg)
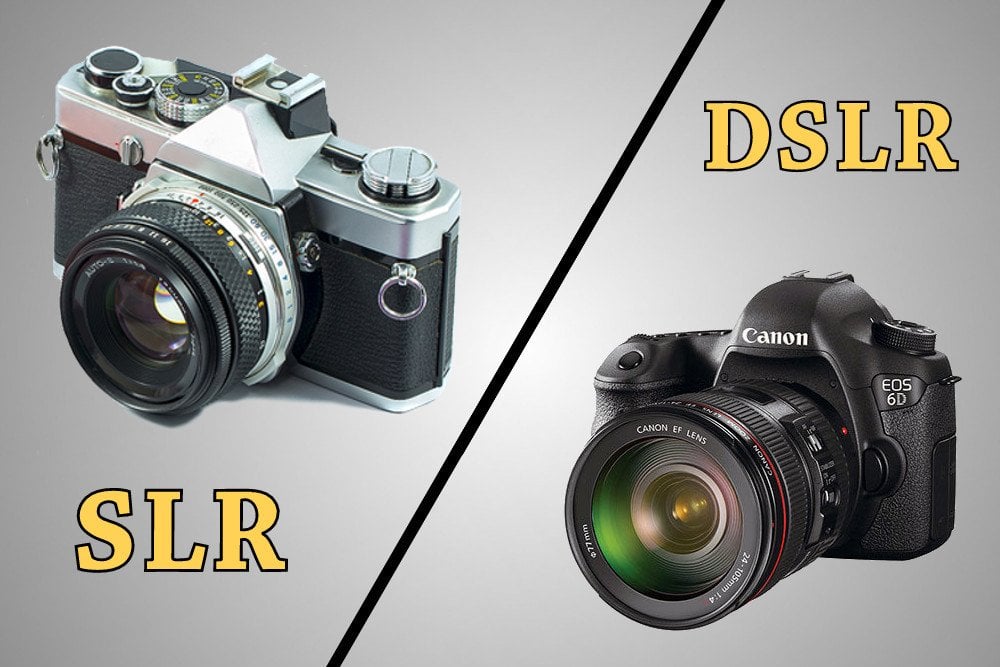
Above is a Single-Lens Reflex (SLR) Camera where an image is recorded in the film; below is a Digital Single Lens-Reflex Camera (DSLR) where an image is directed to the CCD (charge-coupled device responsible for digital imaging)
OTHER PARTS OF THE CAMERA
[1] Viewing system
[2] Film Advancer
[3] Shutter Speed
[4] Lens aperture
[5] Focusing mechanism

MAJOR TYPES OF CAMERA
1. VIEWFINDER TYPE.
The smallest and simplest type of camera. This is also known as an Instamatic camera. Viewfinder camera suffers parallax error.

2. SINGLE-LENS REFLEX.
The best way to determine the entire coverage of the camera is to look behind the lens of the camera. In this manner, the object can be framed properly and recorded in the film. This type of camera eliminates the problem of parallax error.
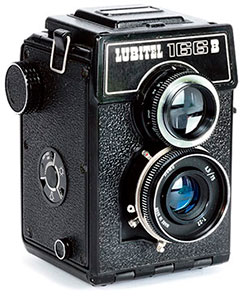
3. TWIN LENS REFLEX TYPE.
Basically, the twin-lens reflex camera has two lenses, one for the viewing and focusing of the subject, and the other is the taking lens. In this type of camera, the image to be photographed is seen as a flat surface as the image is reflected by the mirror behind the viewing lens. This suffers also parallax error.
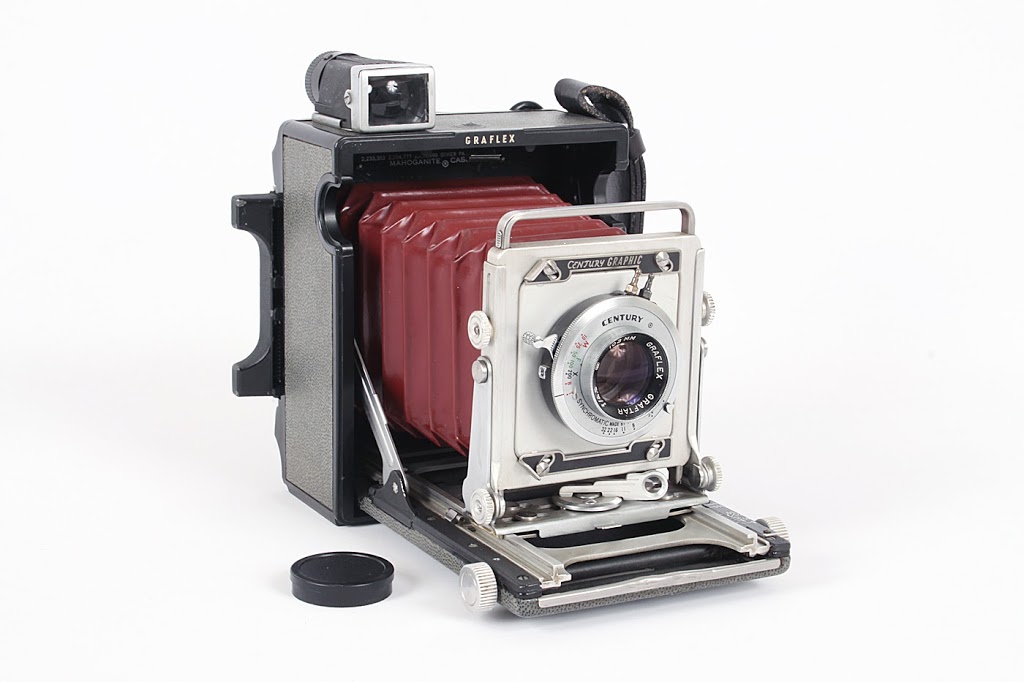
4. VIEW OR PRESS TYPE CAMERA.
The biggest and most sophisticated among the different types of cameras. This type of camera is practically useless for candid and action photography.
5. SPECIAL CAMERAS.
These are cameras that have been devised that offer unique advantages or serve special purposes. Among the special cameras are:
(a) Polaroid
(b) Panoramic Cameras
(c) Aerial Cameras
(d) Miniature and Ultra-miniature Cameras
(e) Underwater cameras
(f) Digital Cameras (using computer processing)

CONTROL OF CAMERAS
Knowing the controls on the camera is necessary to produce a sharp and normal image and negatives after photographing. There are three important controls in a camera to be manipulated and adjusted to its proper setting.
1. FOCUSING CONTROL.

2. THE SHUTTER SPEED (a. leaf shutter; b. focal-plane shutter)


3. DIAPHRAGM CONTROL

4. THE SHUTTER SPEED and F-NUMBER TOGETHER

Practice, trial and error, and experimentation are the best teacher to master the technology in photography.
THE LENS DEFECT
LENS defect is also known as ABERRATION. Aberration is a lens fault in which light rays are not focused properly thereby degrading the image. Different types of aberration are:
[1] CHROMATIC ABERRATION.
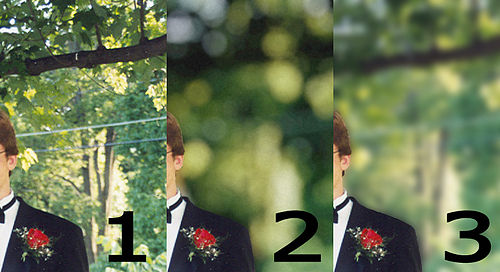
Lens aberration in which light of different wavelengths is focused at different distances behind the lens. It can be corrected by combining different types of glass lenses. (Left is the correct image; right is due to aberration)
[2] SPHERICAL ABERRATION.
Light rays from the subject on the lens axis passing through off-center areas of the lens focus at different distances from the light rays that pass directly through the center of the lens. (Image 1 has no aberration; while numbers 2 & 3 is having chromatic aberration)
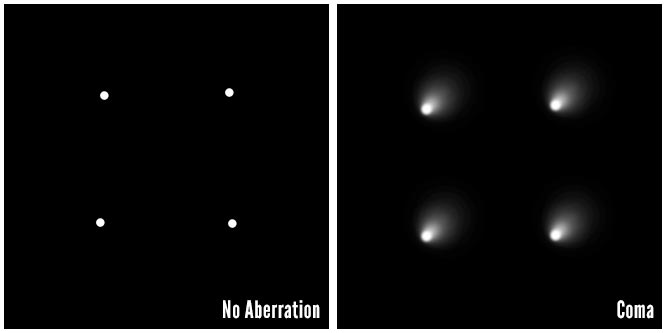
[3] COMA.
A lens aberration in which off-axis light rays focus at different distances when they pass through different areas of the lens.
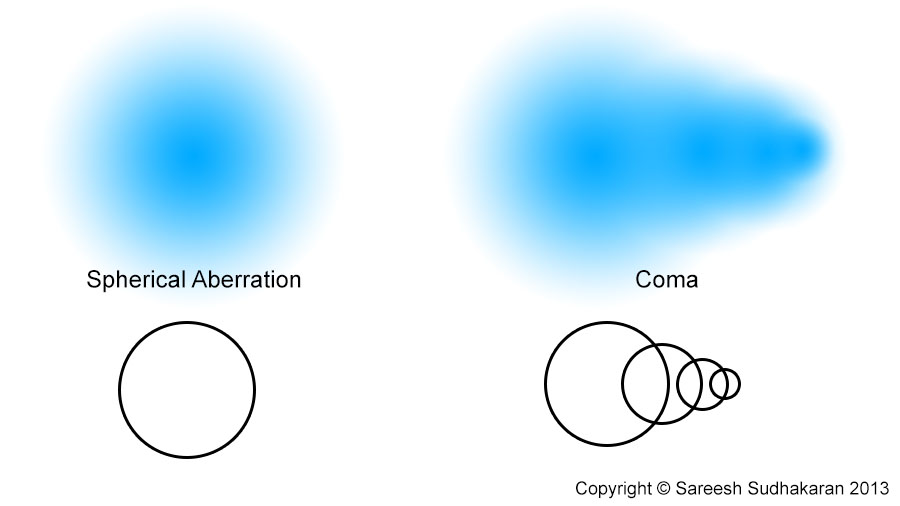
(above is a comparison between spherical and coma as an aberration where the background of the image is diffused and produces blurring of the photograph. Accordingly, in a coma a circle becomes oblong or saucers; see the image of the stars below)
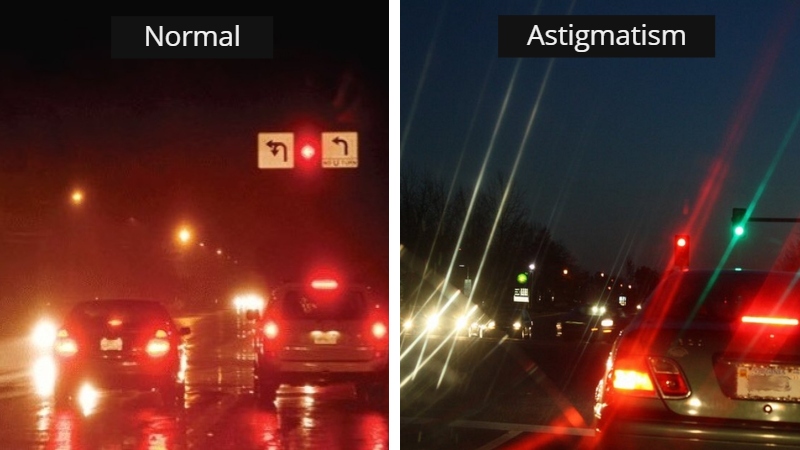
[4] ASTIGMATISM.
A lens aberration in which light rays that pass obliquely through the lens are focused, not as a point but as a line.
[5] FIELD OF CURVATURE.
The plane of sharpest focus is a curved rather than flat surface needed in the film plane.

There were two forms of a field of curvature, pincushion and barrel distortion. See the example of the image below. A point ad shoot camera most often suffers this kind of lens problem and cannot be corrected. SLR and DSLR can be easily corrected through lens adjustment, range adjustment, and replacement of the lens.

Part 2 is divided into two parts and this will be the end of the half of part 2. Before discussing the remaining two (2) more elements of photography (the sensitive materials and chemical processing) let’s assess how is your readiness to proceed with the next topic.
YOU CAN REPEAT REVIEWING FROM THE BEGINNING OF THIS PART IF YOU THINK YOU ARE NOT YET READY. BUT IF YOU ARE READY, CLICK THE “COMPLETE” BUTTON BELOW TO TAKE THE EXAM FOR THIS MODULE.
Then proceed to Part 3.
GOOD LUCK!
3 thoughts on “Photography Part 2”
Leave a Comment
You must be logged in to post a comment.


Completed
complete
Complete I learned a lot